Efficient Git Worktree Usage in VS Code
Learn how to use Git worktrees in Visual Studio Code to work across branches in parallel, stay organized, and avoid constant context switching.
The latest Visual Studio Code release (1.103) includes support for Git worktrees, allowing developers to manage multiple branches more efficiently. I personally did not know about this feature until I read the release note. I thought it was a good opportunity to learn something new about Git. I am no wizard, but if you're like me and new to Git worktrees, this guide will help you get started and make the most of this feature in your workflow.
What are Git Worktrees?
Git worktrees allow you to have multiple working directories associated with a single Git repository. This is particularly useful for working on multiple branches simultaneously without the need to constantly switch between them. For example, you no longer need to stash your changes just to switch branches and apply a quick fix elsewhere.
Setting Up Git Worktrees
To get started, organize your project directory to keep worktrees clear and manageable. Personally, I use the structure down below.
my-awesome-app/
    main/        # main repository clone (for stable work)
    features/    # worktree for implementing new features
    tests/       # worktree for experimentation and testing
    fixes/       # worktree for bug fixes and hotfixes
    reviews/     # worktree for code reviews
So instead of simply cloning my repository in my-awesome-app, I create subdirectories to host the main and all linked worktrees. This is not a technical requirement but helps keep things organized. This way, there is no need to spread your worktree directories across your disk. Just keep them in one single place associated with your project.
Create Worktrees
Assuming you have cloned your repository in a directory named my-awesome-app/main, open a terminal, navigate to the main directory, and start creating your worktrees:
# Navigate to your main repository clone
cd my-awesome-app/main

# Create a features worktree and checkout an existing feature branch
git worktree add ../features feature/user-authentication

# Create a tests worktree and checkout an existing test branch
git worktree add ../tests test/dark-mode

# Create a fixes worktree and create a new hotfix branch
git worktree add -b hotfix/center-div ../fixes
You can create worktrees in different ways: specify an existing branch to check it out immediately, or use -b to create and check out a new branch. This flexibility allows you to set up your persistent workspaces exactly as you need them for your current tasks.
Switching Branches Within Worktrees
The key advantage of generic worktree names is that you can switch between different branches within each worktree based on your current work:
# In your features/ worktree, checkout an existing feature branch
cd ../features
git checkout feature/user-dashboard

# Or create a new feature branch from current position
git checkout -b feature/payment-system

# In your fixes/ worktree, checkout an existing hotfix branch
cd ../fixes
git checkout hotfix/security-patch

# Or create a new hotfix branch from main
git checkout -b hotfix/critical-bug main
Open and Manage Worktrees in VS Code
Open each worktree in a separate VS Code window. You can do this from the integrated terminal (simply run code ../worktree-name to open a new window) or via the source control pane menu:
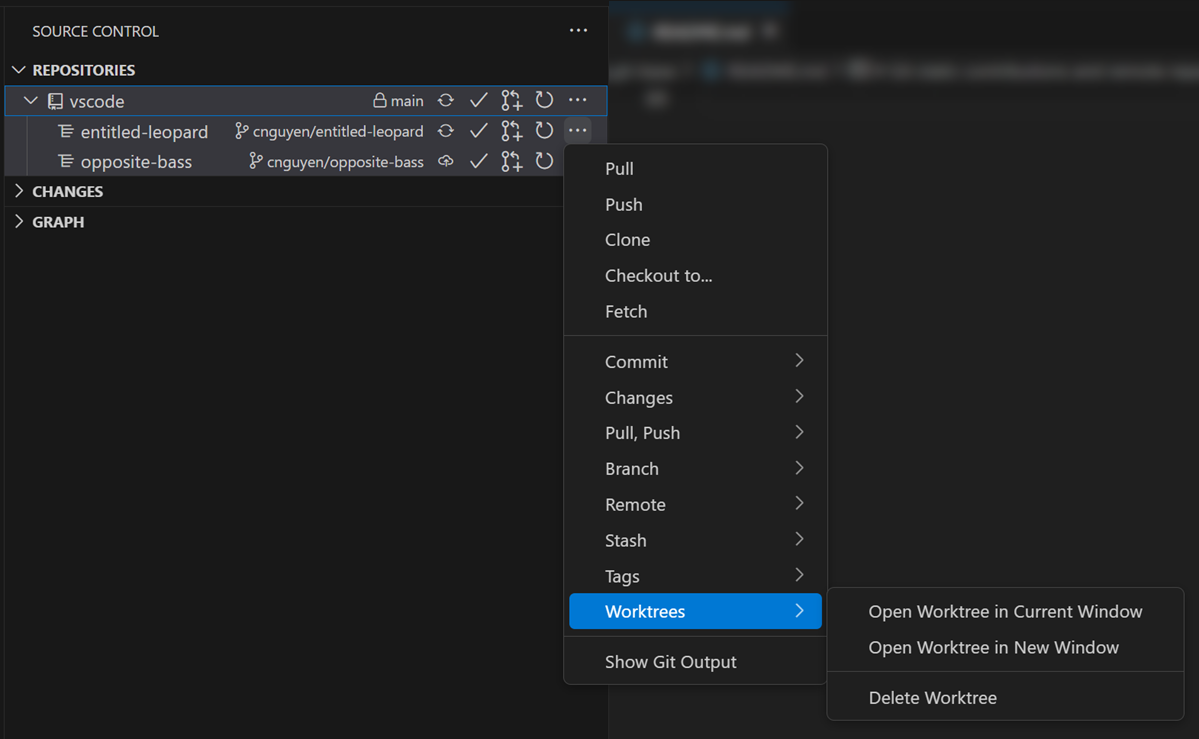
Each worktree has its own Git state, so you can commit, push, and pull independently. Switch between worktrees by opening the relevant folder in a new window.
Remove a Worktree When Finished
To clean up, remove a worktree with git worktree remove. Make sure to never delete a worktree directory manually to avoid issues:
git worktree remove ../features
Conclusion
Git worktrees dramatically improve productivity by letting you work on multiple features, bug fixes, or experiments in parallel, without the friction of constant branch switching. Instead of stashing changes or losing your place, you simply open a new VS Code window for each worktree and get straight to work. This approach keeps you focused and minimizes interruptions, especially when juggling urgent fixes or code reviews alongside ongoing development.
References
- VS Code Worktree Support – Official guide to using Git worktrees in Visual Studio Code, including advanced usage.
- Git Worktree Documentation – Comprehensive reference for all
git worktreecommands and options. - Worktrees: Git's best kept secret – A practical article with tips and real-world examples for using Git worktrees effectively.